Congratulations! on your new Nintendo Switch. So what’s next? You have come here means you are in the right place, we will guide you from scratch to set up the new Nintendo Switch. It is the most unique gaming console, which is easy to carry and allows you to play a variety of games wherever and whenever you want. To set up Nintendo Switch is an easy process but lengthy. Here, in this guide, we will guide you with all the processes from the initial step till playing the game.
What comes in the Nintendo Switch console?
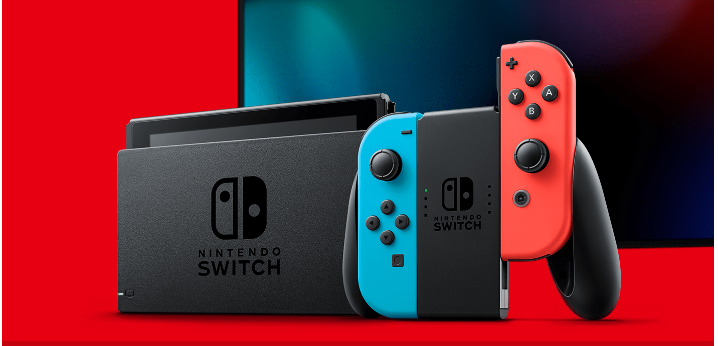
You will find the gaming console of a screen touch tablet, two joy-con controllers (two joy-con strips and grip), HDMI cable link, AC power cable, and console dock (black square oval size with a logo behind).
You can use this console with a TV connection or without it. If you will connect with TV then it will make you feel like a PlayStation. But the first step first is to start the console first. Simply start the power button which is on the top right of the console.
How to get started with the Nintendo Switch Console?
- Basic connection process: Connect the Joy-Con controllers. The screen of the tablet will show which Joy-Con goes on which side, but still, if you will try to connect anyway then also it will not get connected as the setup of the console is done in that way. The minus button will go on the left and the plus button will go on the right.
- Select your language and region.
- Connect to network: Connect the device with the wireless network which is available at your place. Insert the password and you can connect it or save it for later after the setup is done.
- Pick your time zone.
- Connect to TV: You can easily connect the console with the TV or skip this step. If you proceed to connect with the TV you have to disconnect the Joy-con controllers and switch the dock to your TV.
To know about How to connect Nintendo Switch with a TV? you can read our article.
- User name and id: Choose your profile icon and a user name. This icon and name will get displayed on other player’s screens well. One user can create 7 different profiles with the same screen. The profile name can contain 10 characters only.
- Parental Controls Settings: It is obvious that children will play this Nintendo Switch gaming console. Before handing the gadget to the children parents can monitor the usage of the device, restrict some features if not willing to allow the children, and can get notifications on your smart devices. Look at our Parental Controls management for step by step headings on the best way to set this up. After these settings, you will come back to the home screen.
- Extra connections setting: Once on the home screen, you would now be able to synchronize any extra controllers that you may have. In case if you have any extra joy-con controllers and want to experience a much better gaming experience keep reading. You can simply go to the bottom of the screen. Now choose a pair of new controllers to add Joy-con or pro controllers. To connect press sync on the Joy-con controller along with the screen. A Nintendo Switch can support 4 controllers at the same time.
- Wired Network connection: In case you can’t connect with a remote connection or that case you favor a wired association, you can decide to utilize a wired LAN connector rather than Wi-Fi. In the System Settings menu, pick the Internet tab and afterward pick Wired Connection to have your system perceive an ethernet link. LAN connectors are sold independently and utilize a USB plug that can be embedded in any of Switch’s 3 accessible USB ports.
- Play out a system update: Before you can do things like accessing the eShop or play around with the online gaming system, you’ll need to download and update the most recent framework firmware. In case you’re as of now associated with the web, you can open the e-shop. Also, you can explore the System Settings menu and look to the base System tab to provoke an update check.
- Make or sign in to a Nintendo Account: If you want to access the switch online features, then the Switch should be connected to a Nintendo Account, which should be made through a PC or online gadget at this web address, and can’t be made on the system.
There you go with your new Nintendo Switch. Now you can easily access the device and play anywhere and anytime.
Still, facing problems in set up?
Are you still facing trouble in setting up the Nintendo Switch? Do let us know by commenting below in our comments section.


